Connected views
Sometimes you want to connect multiple views together so that they show the same things but in different ways. For example, you may want to have two bubble charts, or a bubble and line charts or a bubble chart and a map side by side. What is different here from just having multiple vizabi instances on the same page is that connected views share models. This means both views would animate together when time slider is playing. Selecting or hovering a bubble on one chart would make it selected or hovered on another chart.
Summary
To achieve that effect we will take the following approach:
- we will create a new tool in vizabi, which will be our custom “combo” tool
- we will then add components we need into that tool
- we will also need to change the default HTML markup in such a way many components would be able to co-exist side by side
- lastly, we will configure the new tool so that all the components we need would be able to find their properties in the config
Create a new tool
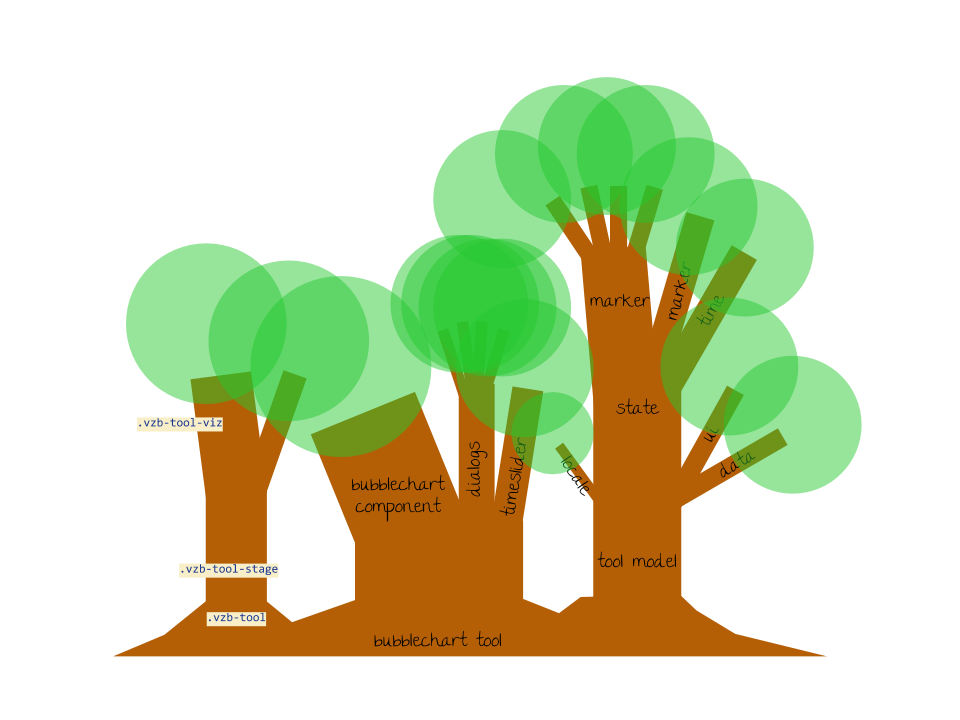
The new knowledge here is what a tool in vizabi actually is. Formally, a tool is the root component of a vizabi instance. Practically this means a tool is like a box that contains a number of components, like visualisations, dialogs, sliders, etc, which all operate using the same shared models. Thus, to make a tool, we wil need to put together a bunch of componets and tell them which models they should use. And models are generated based on config, which we learned about earlier.
Here is the basic pattern how to create a new tool “combo”:
Vizabi.Tool.extend('combo', {

  init: function(placeholder, external_model) {

    this.name = "combo";

    this.template = /*create some html markup here*/;

    this.components = [ /*list components here*/ ];

    this._super(placeholder, external_model);
  },

  default_model: { /*provide a default config here*/ };

});
Add components and link them to markup and models
Here is how we would normally add two components, a bubble chart and a timeslider. Each component is told to be placed in a certain <div>, as defined in this.template. Each component is linked to the models. Think of them as of three trees growing next to each other and connected with ropes. The template is a DOM tree. The component structure is also a tree, where the tool is root, and then each component may have subcomponents, which may also have subcomponents. The model, built based on config, is also a tree, where markers are submodels of state, and hooks are submodels of markers. The model root is called toolModel.
Vizabi.Tool.extend('combo', {

  init: function(placeholder, external_model) {

    this.name = "combo";

    this.template = '<div class="vzb-tool vzb-tool-' + this.name + '">' +
      '<div class="vzb-tool-viz"></div>' +
      '<div class="vzb-tool-timeslider"></div>' +
    '</div>';

    this.components = [{
      component: Vizabi.Component.get("bubblechart"),
      placeholder: ".vzb-tool-viz",
      model: ["state.time", "state.entities", "state.marker", "locale", "ui"]
    }, {
      component: Vizabi.Component.get("timeslider"),
      placeholder: ".vzb-tool-timeslider",
      model: ["state.time", "state.entities", "state.marker", "ui"]
    } ];

    this._super(placeholder, external_model);
  },

  default_model: {
    state: {
      time: { ... },
      entities: { ... },
      marker: {
        axis_x: { ... },
        axis_y: { ... },
        color: { ... },
        size: { ... }
      }
    },
    locale: { ... },
    ui: { ... }
  };

});
Add connected views
Now let’s see how we can combine bubble chart and external API map. Note how the two components are sharing the models:
Vizabi.Tool.extend('combo', {

  init: function(placeholder, external_model) {

    this.name = "combo";

    this.template = '<div class="vzb-tool vzb-tool-' + this.name + '">' +
      '<div class="vzb-tool-viz vzb-tool-viz-bubble"></div>' +
      '<div class="vzb-tool-viz vzb-tool-viz-map"></div>' +
      '<div class="vzb-tool-timeslider"></div>' +
    '</div>';

    this.components = [{
      component: Vizabi.Component.get("bubblechart"),
      placeholder: ".vzb-tool-viz-bubble",
      model: ["state.time", "state.entities", "state.marker", "locale", "ui"]
    }, {
      component: Vizabi.Component.get("extapimap"),
      placeholder: ".vzb-tool-viz-map",
      model: ["state.time", "state.entities", "state.marker", "locale", "ui"]
    }, {
      component: Vizabi.Component.get("timeslider"),
      placeholder: ".vzb-tool-timeslider",
      model: ["state.time", "state.entities", "state.marker", "ui"]
    } ];

    this._super(placeholder, external_model);
  },

  default_model: {
    state: {
      time: { ... },
      entities: { ... },
      marker: {
        axis_x: { ... },
        axis_y: { ... },
        color: { ... },
        size: { ... },
        hook_centroid: { ... }
      }
    },
    locale: { ... },
    ui: { ... }
  };

});
They will animate together when time slider is playing because they are sharing state.time model. They will display the same entities because they share state.entities. And they will react together on select and hover because they share “state.marker”. Now, marker model also comes with hooks, and the hooks will also be shared between bubble chart and ext API map. But here it really depends on the design of the components. Their internal logic will define which hooks they will want to use. Bubble chart will use axis x, y, color and size. ExtAPImap will use color, size and centroid. Color and size will become shared hooks. So when i switch color to show some indicator, it will switch in both views.
By naming the hooks differently in the config you can avoid that. Same goes for markers, entities, time and so on: by naming the models differnetly you can prevent linking.
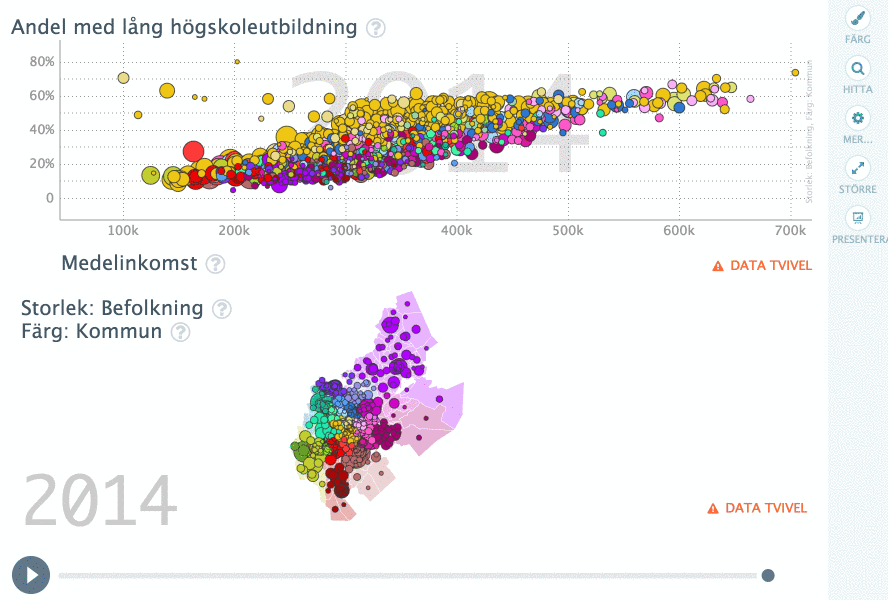
Realistic example
Finally, have a look at a realistic example, which contains sligtly more things in all the trees, but now when you know the drill, adding a few more branches doesn’t make it much differnet.
See the full code and config of this example
PAQ (possibly asked questions)
Why do we need
default_modelwhen we have external config?
— Because we’re lazy. We could just have only external config all the time, but then we would need to drag along all the properties from file to file. Default model allows to store those common properties in the tool code. External config extends default model.
What goes to
default_modeland what goes to external config?
— A nice generic rule is: everything that doesn’t depend on dataset goes to default_model. Different datasets or situations then have different external configs in separate files.
What is a default value of
default_model?
— {}
What is a default value of component array?
— []
What is a default value of this.template HTML markup?
— It’s a bunch of things: placeholders for the components we use in most of our tools. See here
It doesn’t work
— Quite possibly. Common pitfalls are:
- wrong set of models is connected to a component (there is a good help in console about that),
- model is missing a blueprint in the config and wasn’t generated (cannot access property “chickens” of undefined),
- some <div> in the markup is missed or doesn’t have an expected class name (can result in weird errors).
In any of these cases we advice looking into the examples of tools that work and copy-pasting from there. Otherwise, you can write us on github issues.